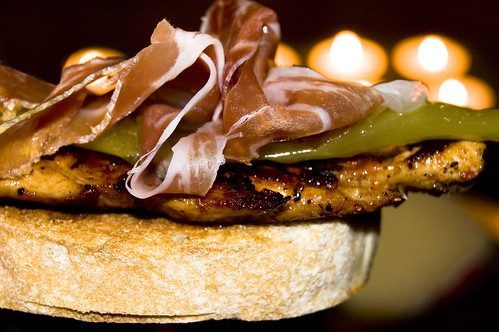
"Crisp greens, tender chicken breast, mandarin oranges, wontons and chopped peanuts in our soy ginger dressing. . ."
Served at the Silver City Brewery in Silverdale, Washington
I recommend it~
Silver City Brewery


I'm hungry all over again!
Photo note:
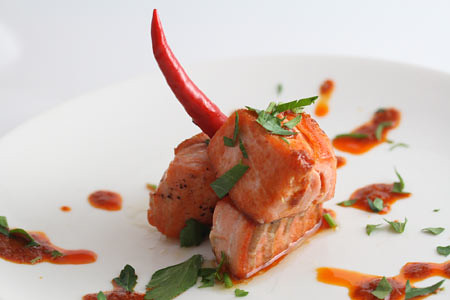
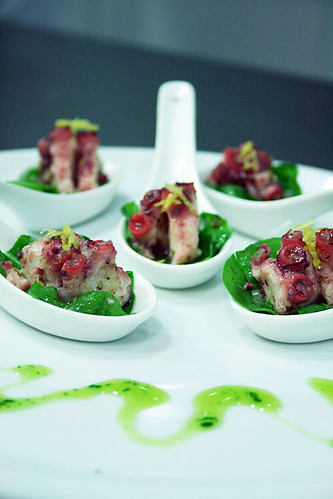
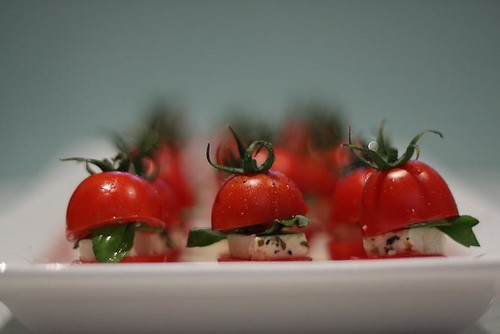
"Stuffed zucchini flowers
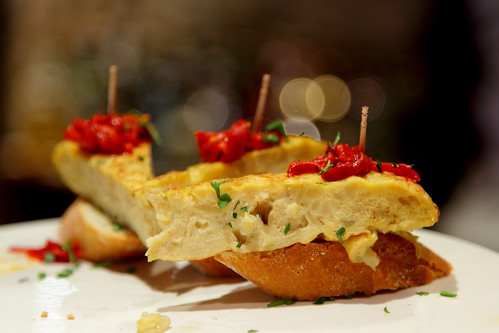
LULO Tapas - Cerveceria - Wine Bar
798 Glenferrie Road
Hawthorn, Victoria, 3122
+ 61 3 9818 8321 - info@lulo.com.au


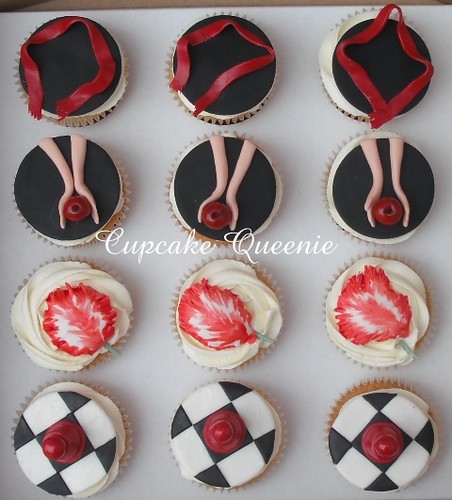
More amazing cupcakes!
Photo note:
"The grade 7 at my youngest sons school have a project on cupcakes.
No ordinary cupcakes btw.
Each child has to make 12 cuppies and each has to have a theme.
They will then have a cake sale in school and the money goes towards buying equipment for the school.
I was asked to come and give them a demo. on how to make a topper and what the final cuppie should look like.
Explore #370"
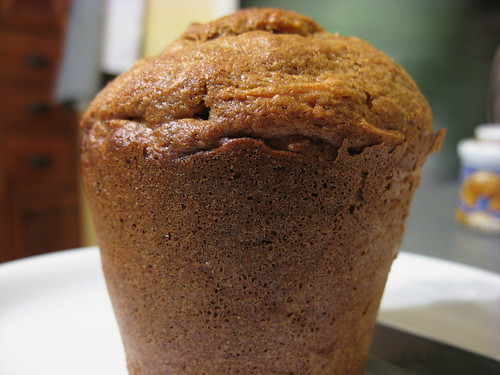
When I found this image, I just couldn't resist posting it.
Here is the photographer's note:
"I made 8 of these muffins, each weighing over half a pound. How big are they? Well, between you and me, one of these muffins escaped from its cooling rack and caused a total solar eclipse throughout most of Australia."
Photo note:
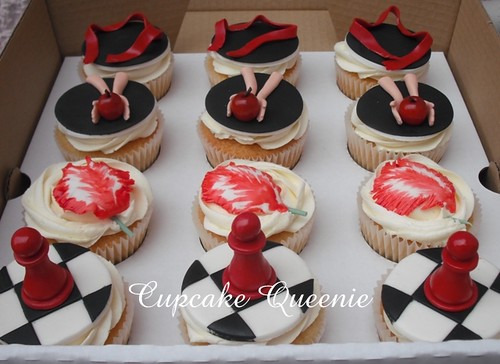
"I was asked to create a set of Twilight series cupcakes for a girls birthday party. I have to say I had no idea what "Twilight" was until I did a search here on Flickr !!!
The cakes are Pineapple & coconut, with coconut buttercream under the toppers.
I forgot to take pictures but I also made chocolate cupcakes, with a hidden "blood" filled centre (raspberry & strawberry sauce) and dark chocolate fudge frosting."
This baker tells us:
"I was asked to create a set of Twilight series cupcakes for a girls birthday party. I have to say I had no idea what "Twilight" was until I did a search here on Flickr !!!
The cakes are Pineapple & coconut, with coconut buttercream under the toppers.
I forgot to take pictures but I also made chocolate cupcakes, with a hidden "blood" filled centre (raspberry & strawberry sauce) and dark chocolate fudge frosting."
It's that time again! What with Eclipse coming out. . .
Photo note:
"know i must look really Twilight obsessed now, but i started on this cake well before all the other Twilight projects.
This is actually my birthday cake, well it would've been if i had finished it anywhere near the beginning of January when my birthday was! I started it but have been so busy that i have only just had time to finish it this week.
It is a dummy cake, at the time of my birthday the last thing any of us would've wanted was cake!"
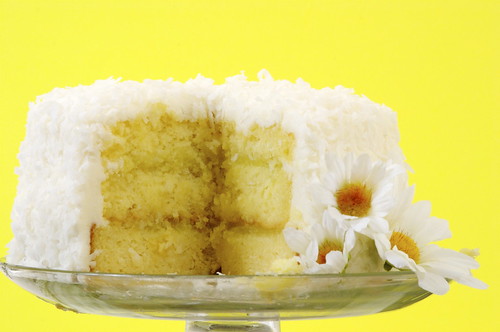
This baker / photographer says:
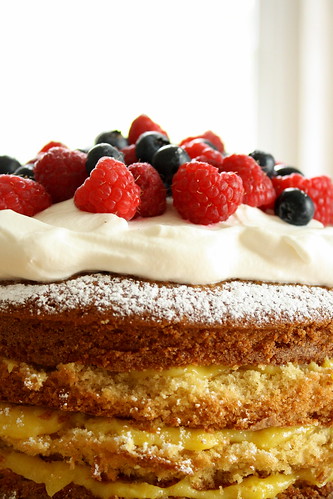
"This was one of the best cakes I have ever made
It is one of my my signature cakes, my friend Ben Cutshall took the picture for me , fabulous work Ben!!!!!
Coconut Key Lime Cake
2-¾ cups all-purpose flour
1 tsp baking powder
¼ tsp salt
2 sticks unsalted butter room temperature
1 ¾ cups extra fine bakers sugar*
4 large eggs
2 tbsp Vanilla
½ cup cream or milk
Position rack in middle of oven and p reheat oven to 350 degrees
Grease and flour two 8 or 9 inch cake pans place greased parchment rounds into bottoms of pans
(Affix cake-baking strips to pans if you have them)
Sift together flour, baking powder and salt set aside. With mixer set on high cream together
Butter and sugar until pale yellow in color and creamy reduce speed to medium add eggs one at a time make sure to completely incorporate after each addition add vanilla next add flour mixture and milk alternately ending with flour mixture scraping sides of mixing bowl to make sure everything is combined beat for a few extra minutes. Pour batter in equal amounts into prepared pans about 2 ½ to 3 cups per pan place pan on rack in the middle of 350 degree preheated oven and bake for about 35 to 45 minutes or until a cake tester inserted into cake comes out clean or free of wet crumbs. Cool cakes on a rack for ten minutes turn caked out on to cooling racks remove parchment paper and cool completely before frosting
Key Lime Curd
3 to 4 tablespoons key lime zest
1/2-cup fresh Key limejuice
1 1/2 cups sugar
6 tablespoons unsalted butter, cut into small pieces
3 egg, lightly beaten
*Do not use bottled Lime Juice
In a medium-size saucepan (use a heavy-bottom, non-reactive saucepan such as stainless steel or an enamel coated pan) over medium heat combine limejuice, sugar and eggs. Bring just to a boil; reduce heat to low and simmer until mixture has started to thicken. Remove from heat and add butter; stir until the butter has melted add lime zest and a very small drop of green food coloring to give the curd a slight green tint.
Note: do not let the mixture boil or it curdle
Remove from heat and cover immediately (to keep a skin from forming) let cool to room temperature.
Will last for up to two weeks in refrigerator can last in the freezer for approximately two months. Lime Curd doesn't freeze solid, so you can spoon out exactly what you need with out defrosting entire container.
Makes approximately 1 1/2 cups lime curd.
Vanilla Butter Cream frosting
1-cup butter r/t
6 to 8 cups confectioners sugar
½ cup milk
1 tsp vanilla extract
¼ tsp salt
In the bowl of electric mixer, cream butter until smooth add sugar, salt, milk and vanilla mix until light and fluffy.
Gradually blend in additional sugar if needed
•Cake strips are place around the outside if the baking pan to help keep the cake moist and level during baking, they can be found on-line under the name Magic cake strips or in Cake supply stores such as Do it with Icing
•The curd can be made in advance and stored in freezer until you need it
•Can frosting can be used to save time"
Gorgeous!
The title itself was worth sharing. Read on:
Toasted Coconut Cake with Coconut Filling and Coconut Buttercream
Toasted Coconut:
2 cups sweetened flaked coconut
Coconut Custard:
3/4 cup whole milk
3/4 cup unsweetened coconut milk
1/2 vanilla bean, seeds scraped
4 large egg yolks
1/3 cup granulated sugar
3 tablespoons cornstarch
2 teaspoons coconut rum (recommended: Malibu)
1/2 teaspoon pure vanilla extract
Coconut Filling:
3/4 cup coconut custard (recipe above), cold
3/4 cup very cold heavy cream
Coconut Buttercream:
2 stick unsalted butter, softened
2 cups confectioners' sugar
3/4 cup coconut custard (recipe above) (cold)
Pinch fine sea salt
Cake:
2 tablespoons softened butter, for pans
2 1/4 cups cake flour, plus more for pans
1 cup whole milk, at room temperature
6 large egg whites, at room temperature
1 vanilla bean, split and seeds scraped
1/2 teaspoon pure vanilla extract
1 3/4 cups granulated sugar
1 tablespoon plus 1 teaspoon baking powder
1 teaspoon fine sea salt
12 tablespoons unsalted butter, cut into 12 pieces, slightly cold
For the toasted coconut:
Preheat oven to 325 degrees F.
Spread the coconut evenly onto a baking sheet and toast until lightly golden brown, stirring once, 8 to 10 minutes. Turn off the oven and let the coconut sit in the oven until very dry and crunchy, about 15 minutes longer.
For the custard:
Combine the milks and vanilla bean and seeds in a medium nonreactive saucepan and bring to a simmer over low heat.
Whisk together the yolks, sugar and cornstarch in a large bowl. Slowly whisk the warm milk into the egg mixture then return the mixture to the pot over medium heat and bring to a boil, whisking constantly, until thickened. Scrape the mixture into a bowl and whisk in the rum and vanilla extract. Let cool to room temperature then cover with plastic wrap and refrigerate until cold, at least 2 hours.
For the filling:
Combine the custard and cream in a bowl and whip until soft peaks form.
For the buttercream:
Beat the butter and sugar in a stand mixer fitted with the paddle attachment until light and fluffy, about 4 minutes. Add the coconut custard and salt and beat until combined and smooth.
For the cake:
Preheat oven to 350 degrees F. Butter and flour 2 (9 by 2-inch) round cake pans and line bottoms with parchment paper.
Whisk together the milk, egg whites, vanilla bean seeds and vanilla extract in a medium bowl.
In the bowl of a mixer fitted with the paddle attachment, mix together the flour, sugar, baking powder and salt. With mixer running at low speed, add the butter, one piece at a time and continue beating until mixture resembles moist crumbs. Add all but 1/2 cup of milk mixture to crumbs and beat at medium speed until the mixture is pale and fluffy, about 1 1/2 minutes. With mixer on low speed, add remaining 1/2 cup of the milk mixture, increase speed to medium and beat 30 seconds more. Scrape sides of bowl and mix for 20 seconds longer. Divide the batter evenly between the cakes pan and smooth the tops using a rubber spatula.
Bake until a toothpick inserted into the center comes out with a few crumbs attached, 22 to 24 minutes. Cool in the pan on baking rack for 10 minutes. Run a small knife around the side of the pan and invert cakes onto the baking rack, removing parchment paper, and let cool completely, about 45 minutes.
To Assemble:
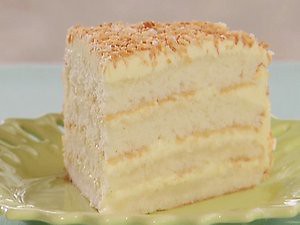
Using a long serrated knife, slice each cake horizontally into 2 layers. Reserve 1 of the flat bottom layers for the top of the cake. Place another layer on a cardboard round cut side up and brush with some of the coco lopez cream. Spoon 1/3 of the coconut filling onto the cake and using a small offset metal spatula, spread it into an even layer, leaving a 1/2-inch border around the edge of the cake. Repeat with 2 more layers. Brush the cut side of the reserved cake layer with the remaining syrup. Place the layer cut side down on top of the cake.
Frost the sides and top of the cake with the buttercream. Pat the coconut onto the sides of the cake and sprinkle the remaining coconut on the top of the cake.
Note: when I made this cake I omitted the coconut simple syrup I used coco Lopez cream to brush on the cakes, and it came out absolutely delishes
And on the buttercream I used 2 cups of confectioners' sugar not 1/3 cup otherwise this buttercream would come out to buttery.
The title itself was worth sharing. Read on:
Toasted Coconut Cake with Coconut Filling and Coconut Buttercream
Toasted Coconut:
2 cups sweetened flaked coconut
Coconut Custard:
3/4 cup whole milk
3/4 cup unsweetened coconut milk
1/2 vanilla bean, seeds scraped
4 large egg yolks
1/3 cup granulated sugar
3 tablespoons cornstarch
2 teaspoons coconut rum (recommended: Malibu)
1/2 teaspoon pure vanilla extract
Coconut Filling:
3/4 cup coconut custard (recipe above), cold
3/4 cup very cold heavy cream
Coconut Buttercream:
2 stick unsalted butter, softened
2 cups confectioners' sugar
3/4 cup coconut custard (recipe above) (cold)
Pinch fine sea salt
Cake:
2 tablespoons softened butter, for pans
2 1/4 cups cake flour, plus more for pans
1 cup whole milk, at room temperature
6 large egg whites, at room temperature
1 vanilla bean, split and seeds scraped
1/2 teaspoon pure vanilla extract
1 3/4 cups granulated sugar
1 tablespoon plus 1 teaspoon baking powder
1 teaspoon fine sea salt
12 tablespoons unsalted butter, cut into 12 pieces, slightly cold
For the toasted coconut:
Preheat oven to 325 degrees F.
Spread the coconut evenly onto a baking sheet and toast until lightly golden brown, stirring once, 8 to 10 minutes. Turn off the oven and let the coconut sit in the oven until very dry and crunchy, about 15 minutes longer.
For the custard:
Combine the milks and vanilla bean and seeds in a medium nonreactive saucepan and bring to a simmer over low heat.
Whisk together the yolks, sugar and cornstarch in a large bowl. Slowly whisk the warm milk into the egg mixture then return the mixture to the pot over medium heat and bring to a boil, whisking constantly, until thickened. Scrape the mixture into a bowl and whisk in the rum and vanilla extract. Let cool to room temperature then cover with plastic wrap and refrigerate until cold, at least 2 hours.
For the filling:
Combine the custard and cream in a bowl and whip until soft peaks form.
For the buttercream:
Beat the butter and sugar in a stand mixer fitted with the paddle attachment until light and fluffy, about 4 minutes. Add the coconut custard and salt and beat until combined and smooth.
For the cake:
Preheat oven to 350 degrees F. Butter and flour 2 (9 by 2-inch) round cake pans and line bottoms with parchment paper.
Whisk together the milk, egg whites, vanilla bean seeds and vanilla extract in a medium bowl.
In the bowl of a mixer fitted with the paddle attachment, mix together the flour, sugar, baking powder and salt. With mixer running at low speed, add the butter, one piece at a time and continue beating until mixture resembles moist crumbs. Add all but 1/2 cup of milk mixture to crumbs and beat at medium speed until the mixture is pale and fluffy, about 1 1/2 minutes. With mixer on low speed, add remaining 1/2 cup of the milk mixture, increase speed to medium and beat 30 seconds more. Scrape sides of bowl and mix for 20 seconds longer. Divide the batter evenly between the cakes pan and smooth the tops using a rubber spatula.
Bake until a toothpick inserted into the center comes out with a few crumbs attached, 22 to 24 minutes. Cool in the pan on baking rack for 10 minutes. Run a small knife around the side of the pan and invert cakes onto the baking rack, removing parchment paper, and let cool completely, about 45 minutes.
To Assemble:
Using a long serrated knife, slice each cake horizontally into 2 layers. Reserve 1 of the flat bottom layers for the top of the cake. Place another layer on a cardboard round cut side up and brush with some of the coco lopez cream. Spoon 1/3 of the coconut filling onto the cake and using a small offset metal spatula, spread it into an even layer, leaving a 1/2-inch border around the edge of the cake. Repeat with 2 more layers. Brush the cut side of the reserved cake layer with the remaining syrup. Place the layer cut side down on top of the cake.
Frost the sides and top of the cake with the buttercream. Pat the coconut onto the sides of the cake and sprinkle the remaining coconut on the top of the cake.
Note: when I made this cake I omitted the coconut simple syrup I used coco Lopez cream to brush on the cakes, and it came out absolutely delishes
And on the buttercream I used 2 cups of confectioners' sugar not 1/3 cup otherwise this buttercream would come out to buttery.